Estimating your fence using Google Earth
I have a massive fence project coming up in a few months, once Upstate NY decides to warm up a bit and the ground thaws out, and I wanted to get a head start on all of my estimating and material gathering. I originally planned on taking a tape measure and heading out into the yard to do some physical measurements, but I only own a 25′ tape and I knew going around my entire yard in 20′ sections would suck big time. I did a bit of searching for other solutions and stumbled across a Google Earth feature I didn’t know about, the measuring tool. I decided to try it out and see if I could estimate my project with it. It worked really well, and I now know that my fence is going to cost at least $2,500 in materials to complete! Although I don’t like the material total I ended up with, the whole measuring process only took me a couple of minutes thanks to the tool, and I’m pretty confident it’s accurate, though I plan on taking manual measurements before buying my materials.
The Measuring Tool
If you aren’t familiar with Google Earth’s measuring tools, they let you put a series of dots on the map and it automatically connects them in series. The tool computes the total length of the line that you create and you can jot it down for future reference. The tool works extremely well for fence measurements, but I bet it could be used for so many other applications, especially on larger measurements that would be even more of a chore with other tools.
The Step by Step
- Visit Google Earth Online, or download the program
- Enter Your Address and Open the Map
- Open the Tool and Plot the Points
- Make Your Estimates
Access Google Earth
The first step to estimating your project is to visit Google Earth. You can do this by going to https://www.google.com/earth/ or just clicking on this link.
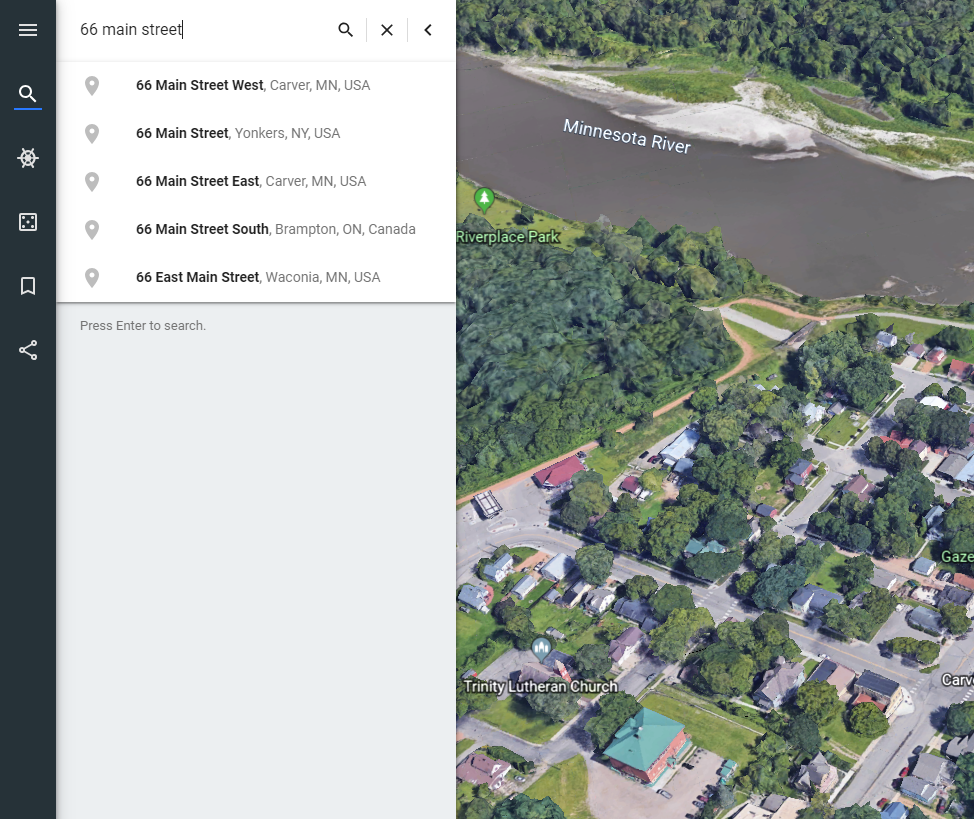
Enter Your Address and Open the Map
Open up Google Earth and type in the address of the location that you want to take measurements at. Google should scoot you off to the location and you’ll be ready to zoom in and start getting the right view of your project.
Access the Tool and Plot the Points
Now that you’re in the satellite view you can zoom in to the desired level, center on the spot you want to measure and begin taking measurements. To do that click on the measurement tool highlighted in the photo below. It’s on the left side of the screen at the bottom of the sidebar menu. 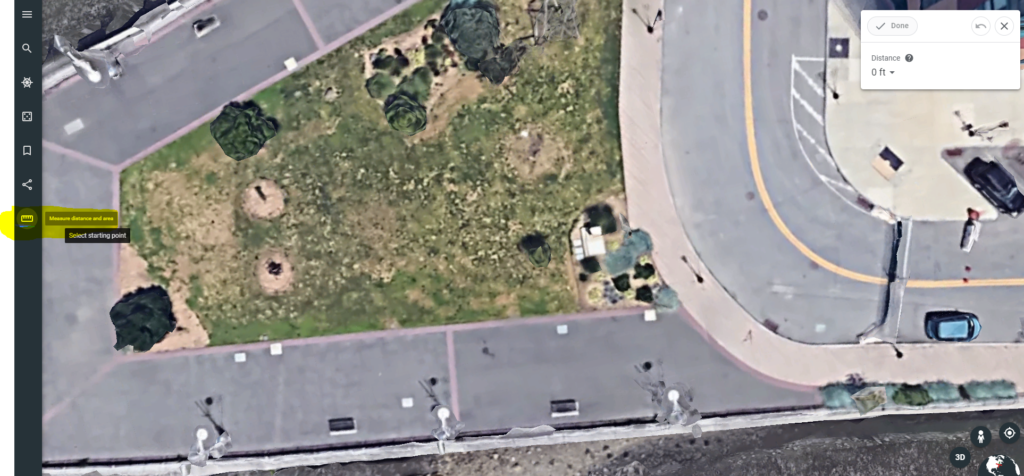
With the tool activated you can begin left-clicking to create an outline. With each new left click that you make you’ll put up another path dot that you can use to create the desired measurement line. Don’t worry too much about being exact right away, just think about how many dots you will need to create your path accurately. Once you have them in place you can easily drag the path dots to a new position for a more accurate measurement.

As you create the path you’ll notice that the total length is configured automatically. The tools awesome at measuring large distances, but it was able to handle my 300 feet of yard just fine as well. I’m showing examples from a random lot to keep from giving out my personal location to the world, but the idea works the same no matter what you want to measure.
Make the Initial Estimates
Once you know the length of your fencing, or whatever else your project is you can easily begin estimating the materials you will need. After getting this information I figured out that I’m going to need around 38 8′ panels of fencing to finish the job, which means it will probably take me a week to finish the job and another week to stop feeling the effects of all that manual labor.
Anyway, hopefully, this little tutorial is useful to you, I know that the Google Earth measurement tool saved me a lot of time, and I’m sure it could do the same for countless other people as well, but it’s something that’s rarely ever mentioned.
About The Author
Ben
Benjamin is a writer of more than a decade, a DIY handyman and a tinkerer of all things technological and electronic.